Thursday, November 12, 2009
Wednesday, November 11, 2009
Tuesday, November 10, 2009
FYI about my Templates
Wednesday, November 4, 2009
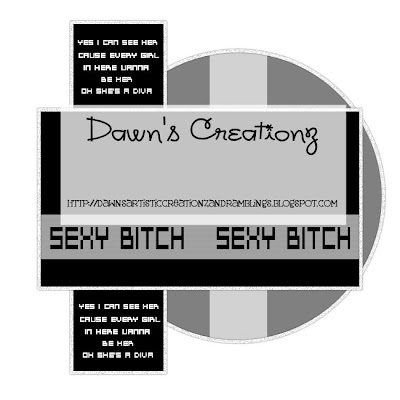
NEW TEMPLATE ~ SEXY BITCH
Made this template for a challenge. Hope someone is able to use it.
Link for my 4shared to download is below preview.
Hugs, Dawn
MY 4SHARED HERE
Sunday, October 25, 2009
Tuesday, October 13, 2009
Friday, October 9, 2009
Sinful Template
Just did a quickie template, lol. 4shared isnt working for me right now so I'm trying boxnet for the first time. Please yell at me if it doesnt work, lol. Hugs, Dawn
Thursday, October 8, 2009
Wednesday, October 7, 2009
New Template~Sporty Chicks
Just made this template. Hope someone can use it for something, lol. Hugs, Dawn
Wednesday, September 30, 2009
NEW TUTORIAL~WITCHES ARE HEXY
WITCHES ARE HEXY
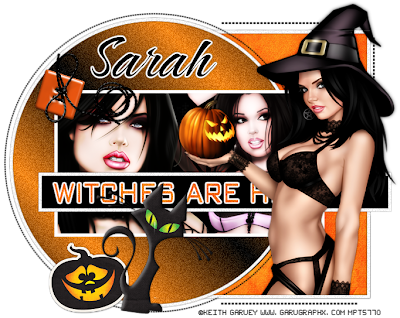
This tutorial was written by myself, Dawn on September 30, 2009. Any similarities to any other tutorials is purely coincidental.
Still a bit new to the tutorial writing and its been awhile since I've done one so hope its OK.
Supplies Needed:
Tube of choice. I'm using the work of the amazing Keith Garvey and as of now you can find his work at MPT HERE.
Scrap kit, H A double L O double U double E N by Sarah at Pimp My Tags With Scraps HERE
Font of choice. I am using Caramel Nuggets.
Template ~ Witches Are Hexy template made by me which you can also get from my blog HERE.
Eye Candy 4000 ~ optional
Xero/Radiance ~ optional
Xero/Radiance ~ optional
DSB Flux Bright Noise ~ optional
Gaussian Blur ~ optional
OK lets get started, remember to save often.
Open all your supplies including the template in your PSP program of choice.
Delete the copyright layer from the template.
On all frame layers of the template go to Effects, Plugins, DSB Flux, Bright Noise Intensity 25 Mix, or a setting of your choice. Then add a dropshadow of choice to all frame layers.
Make a gradient color of black #000000 and orange #fb7f1a angle 45, repeat 3 and make as your foreground color. Click on the circle layer of the template, selections, select all, float, defloat. Add a new raster layer and flood fill with your gradient. Selections, select none. Effects, Plugins, DSB Flux, Bright Noise, Intensity 25 Mix or a setting of your choice. Add dropshadow of choice to this layer and then delete the original circle layer. Click on the large rectangle layer, selections, select all, float, defloat. Copy and paste sb_halloween_pp1 from the kit, selections invert, delete. Selections, select none. Delete the original large frame layer. Click on the medium rectangle layer of the template, selections, select all, float, defloat, add new raster layer and floodfill with black #000000, selections, select none. Delete the original medium rectangle layer. Using your magic wand click in the middle of the medium rectangle frame layer. Selections, modify, expand by 3. Take 2 or 3 tubes of choice, copy and paste them into your selections. Selections, invert, delete. Selections, select none. Bring tubes below frame layer. On your tubes go to, effects, plugins, xero, radiance. My settings were 128, 50, 128, 255 but play with it and use a setting of your choice.
Copy and paste your main tube of choice and place where youd like. I put mine to the right coming out of the large rectangle layer and used my selections tool to get rid of any excess of my tube that I didnt want by selecting that part and hitting delete. I then duplicated my tube and on the duplicate layer, adjust, blur, gaussian blur, radius 3, blend mode, soft light and then add a drop shadow of choice to the original tube.
Click on the wordart layer, selections, select none, float, defloat. Add new raster layer and floodfill with orange #fb7f1a. Selections, select none and delete the original wordart layer. On the new wordart layer, dsb flux, bright noise, intesity 25, mix and then add a gradient glow of choice and dropshadow of choice.
Add a dropshadow of choice to all dot layers.
Add any elements of choice from the kit. I used, sb_halloween_jack o lantern sticker2, sb_halloween_cat3, and sb_halloween_button1. Add dropshadow of choice to all elements.
Add all copyrights.
Using a font of choice, add your name. I used Caramel Nuggets.
Hope you've enjoyed the tutorial. If you have any questions, just hollar at me, lol.
Hugs, Dawn
Tuesday, September 29, 2009
Template, tag and soon to be tutorial...

Well recently I became part of the CT for Pimp My Tags With Scraps and I am super excited about it. Its been awhile since I've written any tutorials. After my BIL was killed in Afghanistan real life took priority. I still wish more than anything I could take this pain away from my sister. PSP was kinda on the back burner for me cause I couldnt really concentrate for anything. I've always been a fan of PMTWS so thought if any place could get me kickstarted again, they would be it. So wish me luck and I will try my best. I made a template that I used in the tag shown and it will be the tag I write the tutorial for, probably tomorrow as I'm about to head to bed. You can pick up the template for download on my 4shared HERE. In this post is a preview of the template and the tag I made and will be tutting. Hope it is OK. Hugs, Dawn
Just an Update
Hey everyone!!! Sorry I havent been around much, just alot happened and I kinda got into a mood. My Mom had come out for my birthday and just left to go back home today, I miss her already. We had a great time!!! I'm going to start paying attenton to my blog again and start writing tutorials again. I hope to have some new stuff soon!! Hope everyone is doing well. Hugs, Dawn
Monday, August 31, 2009
Sunday, August 30, 2009
ZODIAC TEMPLATES
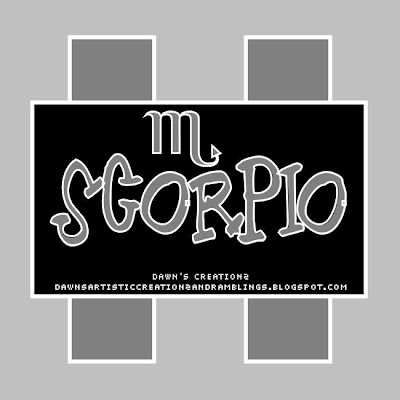
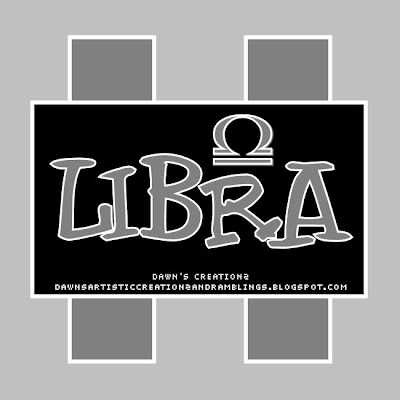
I made a set of zodiac templates to go along with the new Ismael Rac Zodiac Girls. They are pretty basic but I hope someone can use them. I will post a few previews but all 12 are included in the zip. Hugs, Dawn You can get them HERE.
Friday, July 24, 2009
REMEMBERING A HERO
FOREVER IN OUR HEARTS!!!
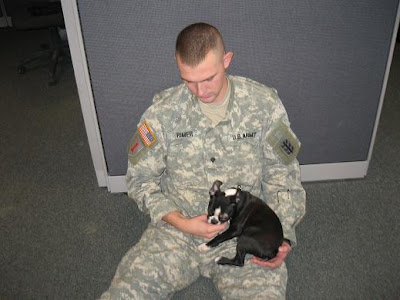
I dont have any words cause words could not express how I feel right now. All I can say is please cherish every minute you can with your loved ones cause you never know when it will be your last. My sisters husband was killed in Afghanistan July 22, 2009 along with another young man. They paid the ultimate price for our country!!! I hurt so bad for my sister and wish so badly to take her pain away. Josh was an amazing man and he loved my sister dearly. RIP JOSH WE LOVE YOU AND WILL NEVER FORGET YOU!!!
Friday, July 3, 2009
Patriotic Collab FTU Kit
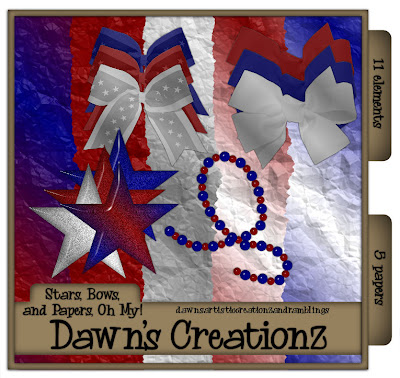
2 really good friends of mine, Cathy and Kaci ,and I have put together a patriotic collab kit. Please keep in mind we are still fairly new to this, lol. I would have liked to work a little more on my part but have had alot going on and with 4th of July being tomorrow we figured we better get it up. So hope someone can find something to do with it. Any questions please feel free to email me littlefieldswife@yahoo.com. Above you will find a preview to my kit and below is a link to my 4shared to download and then below that is links to the other 2 parts.
Hugs, Dawn
Saturday, June 20, 2009
NEW TEMPLATE AND TAG
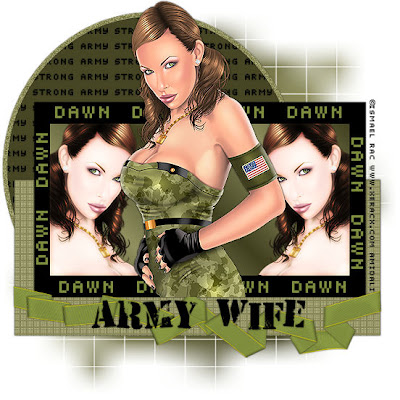
I made a new template earlier along with a tag to show how I used the template. I hope someone can get some use out of it. You can pick up the template from my 4shared.
Hugs, Dawn
Here is a tag I made using the template and a preview of the template.
Wednesday, May 27, 2009
NEW TUTORIAL ~ ISMAELS ROCK OF LOVE
ISMAEL'S ROCK OF LOVE
Awesome scrap kit by Kristin of Wicked Scrapz called Rock of Love
Click on tag to view full size
This tutorial was written by myself, Dawn on May 25th, 2009. Any similarities to any other tutorials is purely coincidental.
Supplies Needed:
Tube of choice. I'm using the work of the amazing Ismael Rac and as of now you can find his work at MPT HERE.
Scrap kit, Rock of Love by Kristin, you can find this awesome FTU kit on Kristin's blog Wicked Scrapz HERE.
Font of choice. I am using Battle Lines.
Mask of choice. I'm using Mask WSL_84 by Chelle at Weescotslass Creations and you can find her masks on her blog HERE.
Eye Candy 4000 ~ optional
Xero/Radiance ~ optional
OK lets get started, remember to save often.
In your PSP program of choice open a new image 550x550 and flood fill white. Add a new raster layer by going to layers, new raster layer. Flood fill this new layer with a gradient of choice. To get a gradient click on your foreground color in your materials and put on a color of choice, I used #fd359b, then click on your background color and change to a color of choice, I used #786790. Then click on your foreground again and change the setting to gradient with the angle on 36 and repeats on 1, style set on linear. Go to layers, new mask layer, from image, from your drop down menu choose WSL_Mask84, click OK. On your layers pallet on the right click on your original mask and merge group. Pick you mask till its the size you like. I dragged mine to fit my whole working canvas.
With your foregound color set on #fd359b and your background color closed off click on add shapes. From your shapes list, chose Ellipse (circle). Line style solid, width set on 20. Draw out a circle to a size of your liking, look at mine for reference. Go to objects, align, center in canvas. Right click on your cirlce over in the layers pallette and change to raster layer. Add some noise to your circle layer by going to Adjust, Add/Remove Noise, click on add noise. Uniform, Noise~ 35%, monochrome checked, OK. Add a gradient glow to your circle by going to Effects, Plugins, Eye Candy 4000 and click on gradient glow. Glow width 3, color white and click on fat. Add a dropshadow of choice to your circle.
Using your magic wand click in the middle of your circle. Go to selections, modify, expand by 10. Copy and paste a paper of choice from the kit, I used Kristin - ROL - Paper 3. Selections, invert and hit delete on your keyboard. Do not deselect yet. Bring the paper layer under your circle. Copy and paste a closeup of your tube inside your circle and hit delete to get rid of the parts of the tube hanging out of the circle. Make sure this layer is below your circle layer but above your paper layer. Add a dropshadow of choice. Change the blend mode to Luminanace Legacy on your tube that you just added in the circle. Copy and paste Kristin - ROL - Wire into your circle layer as well, above your tube layer you just added, delete on your keyboard to get rid of the unwanted parts. Add a dropshadow of choice. Selections, select none.
Copy and paste the word art from the Rock of Love kit, Kristin - ROL - Wordart 1 onto your tag. Resize as needed to have it fit around your circle that you made earlier. Add a dropshadow of choice.
Copy and paste your tube of choice onto your tag and place where you like. Add a dropshadow of choice. On my tube I also went to Plugins, Xero, Radiance.
Add any other elements of choice, I added Kristin - ROL - Skull 1 and Kristin - ROL - Backstage Pass. Place to your liking and add a dropshadow of choice.
Add your copyright info.
Add your name.
All done!!!
Hope you've enjoyed this tut.
Hugs, Dawnlittlefieldswife@yahoo.com
Monday, May 25, 2009
**MEMORIAL DAY**
Wednesday, May 20, 2009
NEW TUTORIAL ~ SPRING DREAMS
SPRING DREAMS
Beautiful Scrap Kit by Bel Vidotti called Tania Mendes part of the Friendship Collection
Click on tag to view full size
Tube of choice, I'm using the beautiful work of Zindy S.D. Nielsen and you can find her work on her own website HERE. Originally mine was purchased from MPT when she was with them but she has since went independent.
I'm using a beautiful scrap kit called Tania Mendes part of the Friendship Collection from Bel Vidotti at Bel Vidotti Scraps and you can find it on here blog HERE.
Open a new image, 600X400 and flood fill background white. Copy and paste paper of choice from the kit, BVS Friendship Tania Paper02. Go to layers, new mask layer, from image, from your drop down menu choose WSL_Mask84, click OK. On your layers pallet on the right click on your original mask and merge group.
Copy and paste frame, BVS Friendship Tania Frame02. Resize the frame to your liking, I resized mine by 80. Using your magic wand, click inside your frame, selections, modify, expand by 5. Copy and paste paper of choice, I used BVS Friendship Tania Paper03, selections, invert and hit delete on your keyboard. While still selected, copy and paste tube of choice and position where you like it and then hit delete on your keyboard. Selections, select none. Drag both layers under your frame. If you want you can do like I did and copy and paste your tube layer again and erase parts to make it look like its hanging over the frame.
Copy and paste any elements of choice that you like and add drop shadow of choice to these elements.
Add a drop shadow also to your tube and your frame.
Add your copy right info.Add your name.
All done!!!
Hope you've enjoyed this tut.
Hugs, Dawnlittlefieldswife@yahoo.com
NEW TUTORIAL ~ ONE WOMAN USO PARADISE
ONE WOMAN USO PARADISE
Gorgeous Scrap Kit by Mar called Beach Paradise
Click on tag to view full size
 For this tutorial I am using the amazing work of Gennadiy Koufay and you can purchase tubes at CILM HERE.
I am using a gorgeous scrap kit by Mar from Scrapping Mar which is a PTU kit called Beach Paradise and you can find that on her blog HERE.
Mask WSL_119 by Chelle at Weescotslass Creations and you can get it from her blog HERE.
Open a new image 600X600, you can resize later if you like. Flood fill your background layer with white. Copy and paste paper of choice from the kit, I used BeachTime3SMar. Go to layers, new mask layer, from image, from your drop down menu choose WSL_Mask119, click OK. On your layers pallet on the right click on your original mask and merge group.
Copy and paste BeachParadiseSMar_ (74 and resize to your liking. I did mine at 25%.
Click inside BeachParadiseSMar_ (74 with your magic wand, go to selections, modify, expand by 5. Copy and paste paper of choice, I used BeachTime10SMar. Selections, invert and hit delete on your keyboard. Drag this layer under your BeachParadiseSMar_ (74 layer.
Copy and paste tube of choice. With mine I duplicated my tube moving one above the life saver and one below and erased parts to make it look like she was sitting in it. You can do this as well depending on what tube you are using.
Add any other elements of choice. I used BeachParadiseSMar_ (16) which I resized by 30%, and put on one side, duplicated and mirrored so that I would have one on each side. Same thing with the flower, BeachParadiseSMar_ (78. I also used the water splash, BeachParadiseSMar_ (57 and the rainbow, BeachParadiseSMar_ (37).
Add a drop shadow of choice to each element and your tube.
Add your copy right info.
Add your name.
All done!!!
Hope you've enjoyed this tut.Hugs, Dawnlittlefieldswife@yahoo.com
Thursday, May 14, 2009
NEW TUTORIAL ~ WHAT IF I'M THE BAD GUY?
WHAT IF I'M THE BAD GUY?
Amazing scrap kit Twlight by Jill of Created By Jill at Scraps With Attitude
Click on tag to view full size.
Template by Yvette
Yvette_EOC_Twilight Template3
Scrap kit by Jill of Created by Jill which you can purchase at Scraps With Attitude
Mask of choice, I am using EBD Mask55 (in my supplies) by Rachel. I have tried finding her site to get a link but each one I click on tells me its not available so if someone has that I would love to know so I could link to her. My supplies HERE (mask).
I'll try and make this quick and simple, lol.
Delete the copyright layer of Yvette's Twilight Template3. Then go to image, canvas size, 650x650 (you can resize later if you like).
Click on your background layer of your template and add a new raster layer. Flood fill that layer with a color or gradient of choice or paper of choice. Go to layers, new mask layer, from image, from your drop down menu choose EBDMask55 by Rachel that you will get from my supplies, click OK. On your layers pallet on the right click on your original mask and merge group.
Do this for each layer of your template. Selections, select all, float, defloat, copy and paste paper of choice from the twilight kit, selections, invert and hit delete on your keyboard. Delete the original template layer and add a drop shadow of choice to the new layer.
Using your magic wand click in the middle of the frame, go to selections, modify, expand by 4, copy and paste image or tube of choice, selections, invert and hit delete on your keyboard.
Add your elements of choice, I used T_moon_CBJ which I placed behind part of my template, T_rose1_CBJ, and T_charm1_CBJ.
Add your copyright info.
Add your name.
All done!!!
Hope you've enjoyed this tut.
Any questions email me at littlefieldswife@yahoo.com
Hugs, Dawn
Hope you've enjoyed this tut.
Any questions email me at littlefieldswife@yahoo.com
Hugs, Dawn
Friday, May 8, 2009
NEW TUTORIAL ~ ALIENS AMONG US
ALIENS AMONG US
AWESOME SCRAP KIT FROM CHRIS KATELYNNS DESIGNS AT SCRAPS WITH ATTITUDE
PLEASE CLICK ON TAG TO VIEW FULL SIZE
I'm using the awesome scrapkit by Chris at Katelynns Desings called Aliens Among Us and you can purchase this kit at Scraps With Attitude HERE.
Delete the copy right layer on Missy's template. Go to image, canvas size and change to 550x550 and then flood fill white the extra area from making the template bigger.
Copy and paste charm-6 under your template layer and resize, I resized mine by height and width 175 and add drop shadow of choice.
On large circle, selections, select all, float, defloat and add new raster layer. Flood fill this layer with color of choice, I used #d1ab00 and then added dsb flux bright noise and drop shadow of choice. Delete original large circle layer.
On your smaller circle layers on the side go through each one by going to selections, select all, float defloat and flood filling with color of choice. For mine I used 2 different solid colors and then a gradient of my 2 solid colors. After doing each one add drop shadow of choice and delete original circle layers.
Click on frame background layer, selections, select all, float, defloat and copy and paste paper of choice, I used paper-12. Selections, invert and hit delete on your keyboard to get rid of the excess. Before deselecting and if you'd like copy and paste your tube of choice on top of the paper inside the frame and hit delete on your keyboard. Selections, select none. On this tube layer change the blend mode to luminance legacy and lower the opacity to 50.
Copy and paste tube of choice and put it where it looks best and add drop shadow of choice.
Then add any elements that you might like. I added accent-4 and accent-10 and added a drop shadow.
Add your copy right info.
Add your name.
All done!!!
Monday, May 4, 2009
SCRAPS WITH ATTITUDE RE GRAND OPENING!!!!
Sunday, May 3, 2009
Needing some help from my great blogging friends!!!
Hey everyone, hope you all are well. I was needing some help for a friend of mine. My friend Cathy has a blog and like myself has some troubles getting the page set as she wants it. I dont think she needs anything made but maybe some pointers on the header tag and getting it centered along with some info on the background tepmlates and what not. If you could please help her out it would be so greatly appreciated. You can find her blog HERE. And maybe just leave her a message in her shout box if your able to give her a hand. Thanks so much. HUGS
Saturday, May 2, 2009
BE GENTLE ~ SEMI TUT, LOL, ALL FTU
BE GENTLE
CLICK ON TAG TO VIEW FULL SIZE AND ANIMATION
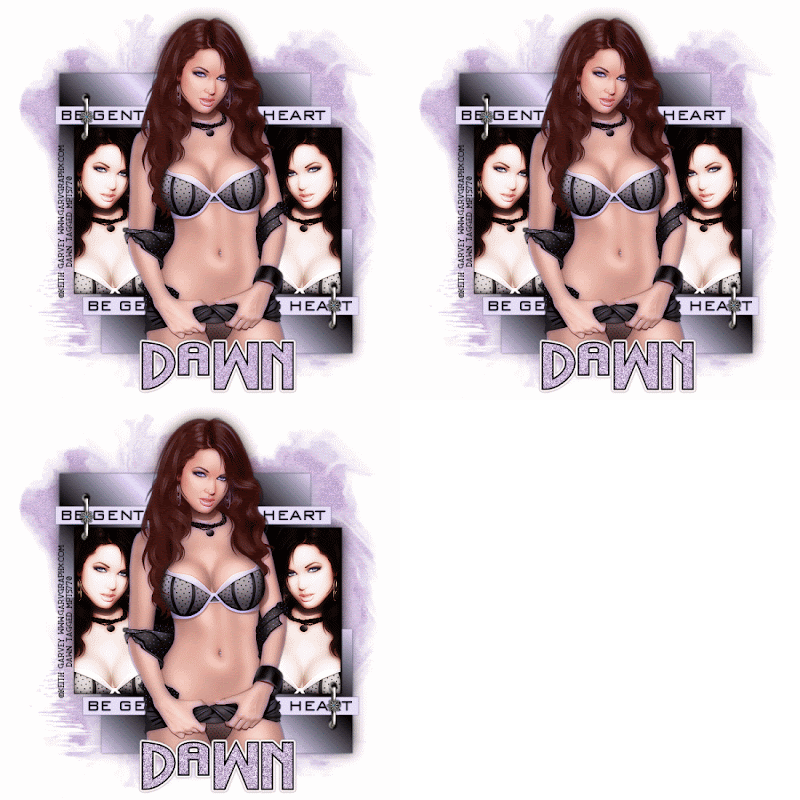 Just playing around with one of the new Garv tubes and came out with this. Might tut it tomorrow if I can get the tut writing mojo going again, lol. Its pretty simple so you could probably look at it and be able to do it. I used Mask 09 by Yarrow that you can get from her site HERE and Template 196 by Missy at Divine Intentionz HERE. I free rotated the template 90 degrees to the right. Added xero radience to my 2 tubes in the middle. Any questions on how I did anything, just hollar. My name is animated with dsb flux bright noise but I believe cannot be seen on blogger. Hugs, Dawn
 Wednesday, April 29, 2009
Cathing up on Awards...
Sorry its taken me so long to get this posted. I truely appreciate those who have given it to me and I'm very honored!!! It means alot to me and I thank you. I have received this award from TRACEY, ROBIN and SYLVIE. Thanks girls, ya'll ROCK. Luvs Ya!!! Please visit their amazing blogs by clicking on their linked name.

The rules of this award is to place it on your blog along with the name and link to those who have given you the award and pass it on to 10 other blogs that you think are magically. Sorry if this is a repeat for anyone.
I pass this on to:
1. Cathy at CJ's Inspired Creations
2. Mar at ScrappingMar
3. Jessica at Scraps By Jessica
4. Kay at KayXclusive
5. RebelChick at Whispers Of A Memory
6. Tammy at Tammy's Scraps
7. LadyQueen at LadyQueens PSP Creations
8. Beaches at Blame Beaches
9. Ali at Designs By Ali
10. Pimptress at Pimp'd Designz
NEW TUTORIAL ~ ANGELS WATCHING OVER US
ANGELS WATCHING OVER US
STUNNING SCRAP KIT CALLED AMGELS AMONGST US BY TWINKY
CLICK ON TAG TO VIEW FULL SIZE
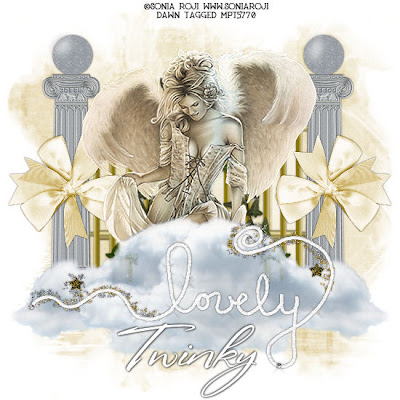 For this tutorial I am using the beautiful work of Sonia Roji (I believe this tube is no longer available) but there are many other beautiful ones that would work as well. You can purchase Sonia Roji's work at MPT HERE.
Stunning scrap kit by Twinky called Angels Amongst Us and you can purchase this kit at Scraps With Attitude HERE.
Lets get started:
Open a new working canvas 550x550 and flood fill white. Copy and paste paper of choice, I used Twinky_AngelsAmongstUs_Paper9. Then go to layers, new mask layer, from image, from your drop down menu choose Mask 09 by Yarrow, click OK. On your layers pallet on the right click on your original mask and merge group.
Copy and paste Twinky_AngelsAmongstUs_Gates and resize and drop shadow to your liking.
Copy and paste your tube of choice and resize and drop shadow to your liking.
Copy and paste Twinky_AngelsAmongstUs_Cloud1 above your tube layer. I duplicated mine a few times and resized and placed around my tube.
Add any other elements of choice that you would like, there are many beautiful ones to chose from. I also added, Twinky_AngelsAmongstUs_Bow1 and Twinky_AngelsAmongstUs_Lovely.png. Resize and add drop shadow of choice.
Add your copy right info. Add your name. All done!!!Hope you've enjoyed this tut.
Hugs, Dawn
Tuesday, April 28, 2009
NEW TUTORIAL ~ SERINA
SERINA
BEAUTIFUL SCRAP KIT VICKY BY JESSICA
CLICK ON TAG TO VIEW FULL SIZE
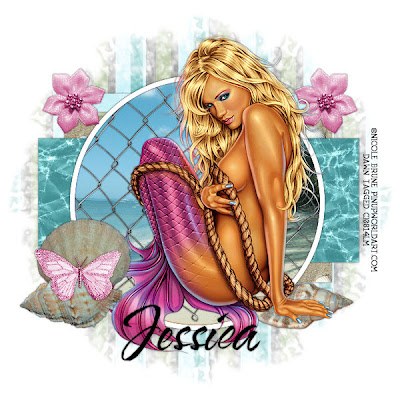 For this tutorial I am using the gorgeous work of Nicole Brune which you can purchase from CILM HERE.
I am using a beautiful scrap kit called Vicky from Jessica and you can visit her blog HERE. It is a PTU kit so I can not supply it. But please go to her site and check out this kit along with the many other beautiful kits she has.
Any beach scene of choice.
OK Lets get started.
On Sara's template #44, delete copy right layer, go to image, free rotate, to the right by 90 degrees, all layers checked.
Add a new raster layer and flood fill white and bring this layer to the bottom under all the template layers.
On top of your white background layer, copy and paste a paper of choice I used V_TS_paper 20_JD. Go to layers, new mask layer, from image, from your drop down menu choose WSL_Mask4, click OK. On your layers pallet on the right click on your original mask and merge group. I lowered the opacity of my mask to 75.
Click on your frame layer and add drop shadow of choice.
Click on your frame background layer, selections, select all, float, defloat and copy and paste your beach scene of choice. Selections, invert and delete on your keyboard. Delete your original frame background layer. On your new beach scene you can colorize to your liking to match your tube or other colors used in your tag.
I copied and pasted V_net1_JD as a new layer above my beach scene but below my frame layer.
On rectangle 2, selections, select all, float, defloat, copy and paste paper of choice, I used V_TS_paper 11_JD. Selections, invert, delete on your keyboard. Selections, select none, add drop shadow of choice. Delete the original rectangle 2 layer.
On rectangle 1 layer, selections, select all, float, defloat, copy and paste paper of choice, I used V_TS_paper 19_JD. Selections, invert, delete on your keyboard. Selections, select none, add drop shadow of choice. Delete the original rectangle 1 layer.
On thin rectangle 1, selections, select all, float, defloat, copy and paste paper of choice, I used V_TS_paper 12_JD. Selections, invert, delete on your keyboard. Selections, select none, add drop shadow of choice. Delete the original thin rectangle 1. Repeat this same process for thin rectangle 2 using the same paper.
Add tube of choice and drop shadow.
Add elements of choice, resizing and coloring to your liking. I used V_butterfly4_JD(colorized to match my tube), V_fabricflower2_JD(colorized to match my tube), V_shell1_JD, V_shell2_JD and V_shell5_JD.
There are so many more wonderful and beautiful elements and papers in this kit!!!
Add your copy right info.
Add your name.
All done!!
Hope you've enjoyed this tut.
Hugs, Dawn
Monday, April 27, 2009
NEW TUTORIAL ~ MISSIN MY HERO
MISSIN MY HERO
AMAZING PTU KIT BY QUEENBRAT
BOOTS ON THE GROUND
CLICK ON TAG TO VIEW FULL SIZE
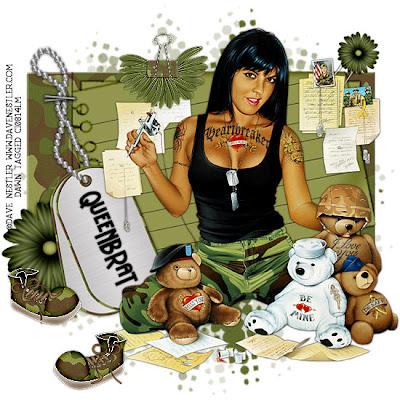 For this tutorial I am using the awesome work of Dave Nestler and you can purchase his work at CILM HERE.
I am using an amazing scrap kit from QueenBrat called Boots On The Ground which covers all military and you can purchase this kit at Scraps With Attitude HERE.
Lets get started, this should be a pretty quick one.
Open a new image 550x550 and flood fill white. Copy and paste paper of choice from the kit, I used Green QBD_BootsOnTheGround_Paper14. Go to layers, new mask layer, from image, from your drop down menu choose Vix Mask 147, click OK. On your layers pallet on the right click on your original mask and merge group.
Copy and paste Green QBD_BootsOnTheGround_Journal03 on top of your mask and resize to a liking of your choice. I made mine a little bigger.
Copy and paste tube of choice and place to your liking.
Copy any elements of choice and place to your liking, I used, Green QBD_BootsOnTheGround_Binderclip03 and Green QBD_BootsOnTheGround_Boots03.
Add a drop shadow of your liking to your tube and elements.
Resize your tag to your liking.Add copy right info.Add your name.
All done!!
Hope you've enjoyed this tut.
Hugs, Dawn
littlefieldswife@yahoo.com
All done!!
Hope you've enjoyed this tut.
Hugs, Dawn
littlefieldswife@yahoo.com
NEW TUTORIAL ~ GLAM ROCK STAR
GLAM ROCK STAR
Great PTU kit by Ali
Click on tag to view full size
I am using an amazing scrap kit by Ali called GLAM ROCK at Scraps With Attitude which you can purchase HERE.
OK lets get started:
Open all supplies your gonna use in PSP.
Open up a new image 550x550 (you can resize later if wanted).
If not already done, flood fill your background white.
Copy and paste paper of choice, I used DBA PAPER 1.
Go to layers, new mask layer, from image, from your drop down menu choose Vix Mask 232, click OK. On your layers pallet on the right click on your original mask and merge group. you can lower the opacity of this mask layer if you would like, I did mine at 75 opacity.
Copy and paste frame of choice on top of your mask, I used DBA FRAME 2. Using your magic wand click inside the circle part of your frame. Then go to selections, modify, expand, by 5. With mine I added a new layer and flood filled white so that I could lower the opacity of my paper once added and it wouldnt show through. Selections, select none and then bring your white circle under your frame. Once again using your magic wand click in the circle part of your frame. Selections, modify, expand by 5. Copy and paste paper of choice, I used DBA PAPER 20. Selections, invert and delete on your keyboard to get rid of the excess. Selections, select none. Drop this layer below your frame layer but above the white circle layer. I dropped the opactiy of this layer to 70.
Add your tube!
Add any elements of choice, I used DBA BASS GUITAR 1, DBA MICROPHONE 1, and DBA WORD ART 2.
Drop shadow tube and all elements including frame with a drop shadow of choice.
Resize your tag to your liking.Add copy right info.Add your name.
All done!!
Hope you've enjoyed this tut.
Hugs, Dawn
littlefieldswife@yahoo.com
All done!!
Hope you've enjoyed this tut.
Hugs, Dawn
littlefieldswife@yahoo.com
Friday, April 24, 2009
NEW TUTORIAL ~ ETERNAL ROUTE 66
ETERNAL ROUTE 66
AWESOME PTU KIT BY MAR CALLED ROUTE 66
CLICK ON TAG TO VIEW FULL SIZE
 For this tutorial I am using the amazing works of Dave Nestler and you can purchase his work at CILM HERE.
I am using an awesome scrap kit by Mar from Scrapping Mar which is a PTU kit called Route 66 and you can find that on her blog HERE.
OK lets get started. Open up Pookers template #33 and delete the copy right layer. Go to image, canvas size, 600x600. (You can resize later if you want). Flood fill the bottom layer with white to fill in the gaps after making the canvas bigger.
On top of your bottom white layer, add a new raster layer. Copy and paste paper of choice, I used Paper 7. Go to layers, new mask layer, from image, from your drop down menu choose Vix Mask 147, click OK. On your layers pallet on the right click on your original mask and merge group. you can lower the opacity of this mask layer if you would like, I did mine at 75 opacity. Add a new raster layer on top of the mask layer you just did. Make your foreground color #96413c and your background color #4e5275. Click on your foreground color and make it a gradient Angle:45, Repeats:3. OK. Flood fill your new raster layer with this gradient. Go to layers, new mask layer, from image, from your drop down menu choose Vix Mask 147, click OK. On your layers pallet on the right click on your original mask and merge group. You can also lower the opacity of this layer as well if you would like, I also did 75 on this one as well. With this mask layer you will go to image, flip, image, mirror.
On your rectangle 1 go to selections, select all, float, defloat and copy and paste paper of choice, I used Paper 14. Selections, invert, delete on your keyboard, selections, select none. Delete the original rectangle 1 layer. On your new rectangle 1 layer go to Adjust, Add/Remove noise...Add noise with settings: Uniform, Noise 30%, Monochrome checked and then add drop shadow of choice.
On the white ring layer just add a drop shadow of choice.
On rectangle 2 layer go to selections, select all, float, defloat and copy and paste paper of choice, I used Paper 3. Position in your selection where you want your paper to be and the parts you want showing. Selections, invert, delete on your keyboard, selections, select none. Delete the original rectangle 2 layer and add a drop shadow of choice to your new rectangle 2 layer.
Click on strip 1, selections, select all, float, defloat. Add a new raster layer and flood fill with black. Selections, select none. Delete original strip 1 layer and add a drop shadow of choice to your new strip 1 layer. Do the same exact thing for strip 2.
On the circle layer, selections, select all, float, defloat and copy and paste paper of choice, I used Paper 13. Selections invert and delete on your keyboard. While my circle layer was still selected I copied and pasted a part of a tube into the circle as well and hit delete on my keyboard to get rid of the excess. Selections, select none. I then changed the blend mode on that tube layer to luminance legacy. Delete the original circle layer and drop shadow your new circle layer.
I then closed off my white background layer and both mask layers and merged visible. Open back up the layers you just closed off. On your merged layer, image, resize, width and height 115. Make sure you dont have all layers checked.
Copy and paste your tube and add drop shadow of choice.
Resize your tag to your liking.
Add copy right info.
Add your name.
Add copy right info.
Add your name.
All done!!
Hope you've enjoyed this tut.
Hugs, Dawn
Thursday, April 23, 2009
NEW TUTORIAL ~ PRETTY MISS SPRING THING
PRETTY MISS SPRING THING ~ USING SPRING INTO HAPPINESS KIT BY JESSICA
CLICK ON TAG TO VIEW FULL SIZE
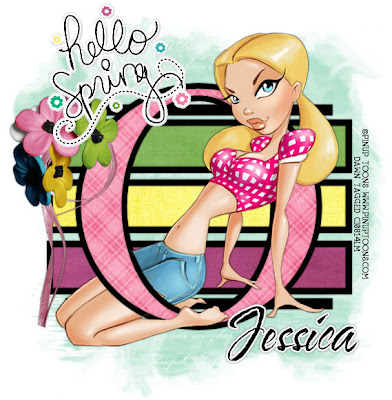 For this tutorial I am using the amazing works of Pinup Toons which you can purchase from CILM HERE.
I am using an awesome scrap kit called Spring Into Happiness from Jessica and you can visit her blog HERE. It is a PTU kit so I can not supply it. But please go to her site and check out this kit along with the many other beautiful kits she has. There is so much more to this spring kit than you see in my tag.
Lets get started.
On your template #43 delete copy right layer.
Drop shadow your O frame and your black stripes with a drop shadow of choice.
On your bottom white layer copy and paste a paer of choice above this layer. I used SIH_paper15_JD. Then go to layers, new mask layer, from image, from your drop down menu choose Mask 09 by Yarrow, click OK. On your layers pallet on the right click on your original mask and merge group. I lowered the opacity and resized mine a bit but thats totally up to you.
On your O frame background, selections, select all, float, defloat and copy and paste paper of choice, I used SIH_paper11_JD. Go to selection, invert and hit delete on your keyboard. Selections, select none and delete frame background layer.
Using your magic wand click inside the lighter gray area of your stripe1 layer. Copy and paste paper of choice. Selections, invert, delete. Selections, select none. Using your magic wand again, click inside the darker gray area of your stripe1 layer. Add new raster layer and flood fill with black. Selections, select none. Delete your original stripe1 layer and bring your color paper below the black frame layer and add drop shadow of choice to the black frame layer. Do this same process for stripe layer2 and 3, using different colors and not forgetting to add the back frame layer along with bringing the color layer under the frame layer and adding the drop shadow.
On the top layer add your tube as a new layer, resize to your liking and add drop shadow of choice. i chose to duplicate mine and bring one below the frame O layer and erased parts of it so it looked like she was weaving in and out of the O. This part is totally up to you and takes a little play to get right.
You can then add and if need be resize any elements of choice. I used SIH_ribbonwithflowers1_JD and SIH_wordartsticker1_JD. But there are so may more elements that you can add to yours. Add drop shadows of choice to your elements.
Add your copy right info. Add your name. All done!!!
Hope you've enjoyed this tut.
Hugs, Dawn
littlefieldswife@yahoo.com
Hope you've enjoyed this tut.
Hugs, Dawn
littlefieldswife@yahoo.com
Subscribe to:
Posts (Atom)


