
ETERNAL ROUTE 66
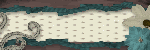
AWESOME PTU KIT BY MAR CALLED ROUTE 66
CLICK ON TAG TO VIEW FULL SIZE
 For this tutorial I am using the amazing works of Dave Nestler and you can purchase his work at CILM HERE.
I am using an awesome scrap kit by Mar from Scrapping Mar which is a PTU kit called Route 66 and you can find that on her blog HERE.
OK lets get started. Open up Pookers template #33 and delete the copy right layer. Go to image, canvas size, 600x600. (You can resize later if you want). Flood fill the bottom layer with white to fill in the gaps after making the canvas bigger.
On top of your bottom white layer, add a new raster layer. Copy and paste paper of choice, I used Paper 7. Go to layers, new mask layer, from image, from your drop down menu choose Vix Mask 147, click OK. On your layers pallet on the right click on your original mask and merge group. you can lower the opacity of this mask layer if you would like, I did mine at 75 opacity. Add a new raster layer on top of the mask layer you just did. Make your foreground color #96413c and your background color #4e5275. Click on your foreground color and make it a gradient Angle:45, Repeats:3. OK. Flood fill your new raster layer with this gradient. Go to layers, new mask layer, from image, from your drop down menu choose Vix Mask 147, click OK. On your layers pallet on the right click on your original mask and merge group. You can also lower the opacity of this layer as well if you would like, I also did 75 on this one as well. With this mask layer you will go to image, flip, image, mirror.
On your rectangle 1 go to selections, select all, float, defloat and copy and paste paper of choice, I used Paper 14. Selections, invert, delete on your keyboard, selections, select none. Delete the original rectangle 1 layer. On your new rectangle 1 layer go to Adjust, Add/Remove noise...Add noise with settings: Uniform, Noise 30%, Monochrome checked and then add drop shadow of choice.
On the white ring layer just add a drop shadow of choice.
On rectangle 2 layer go to selections, select all, float, defloat and copy and paste paper of choice, I used Paper 3. Position in your selection where you want your paper to be and the parts you want showing. Selections, invert, delete on your keyboard, selections, select none. Delete the original rectangle 2 layer and add a drop shadow of choice to your new rectangle 2 layer.
Click on strip 1, selections, select all, float, defloat. Add a new raster layer and flood fill with black. Selections, select none. Delete original strip 1 layer and add a drop shadow of choice to your new strip 1 layer. Do the same exact thing for strip 2.
On the circle layer, selections, select all, float, defloat and copy and paste paper of choice, I used Paper 13. Selections invert and delete on your keyboard. While my circle layer was still selected I copied and pasted a part of a tube into the circle as well and hit delete on my keyboard to get rid of the excess. Selections, select none. I then changed the blend mode on that tube layer to luminance legacy. Delete the original circle layer and drop shadow your new circle layer.
I then closed off my white background layer and both mask layers and merged visible. Open back up the layers you just closed off. On your merged layer, image, resize, width and height 115. Make sure you dont have all layers checked.
Copy and paste your tube and add drop shadow of choice.
Resize your tag to your liking.
Add copy right info.
Add your name.
Add copy right info.
Add your name.
All done!!
Hope you've enjoyed this tut.
Hugs, Dawn


No comments:
Post a Comment