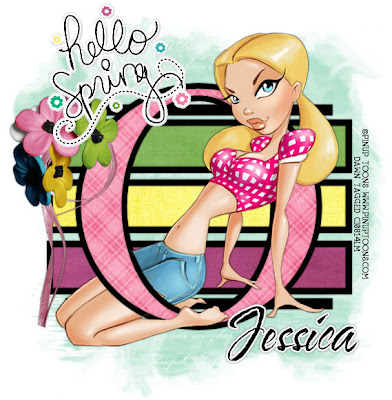
PRETTY MISS SPRING THING ~ USING SPRING INTO HAPPINESS KIT BY JESSICA
CLICK ON TAG TO VIEW FULL SIZE
 For this tutorial I am using the amazing works of Pinup Toons which you can purchase from CILM HERE.
I am using an awesome scrap kit called Spring Into Happiness from Jessica and you can visit her blog HERE. It is a PTU kit so I can not supply it. But please go to her site and check out this kit along with the many other beautiful kits she has. There is so much more to this spring kit than you see in my tag.
Lets get started.
On your template #43 delete copy right layer.
Drop shadow your O frame and your black stripes with a drop shadow of choice.
On your bottom white layer copy and paste a paer of choice above this layer. I used SIH_paper15_JD. Then go to layers, new mask layer, from image, from your drop down menu choose Mask 09 by Yarrow, click OK. On your layers pallet on the right click on your original mask and merge group. I lowered the opacity and resized mine a bit but thats totally up to you.
On your O frame background, selections, select all, float, defloat and copy and paste paper of choice, I used SIH_paper11_JD. Go to selection, invert and hit delete on your keyboard. Selections, select none and delete frame background layer.
Using your magic wand click inside the lighter gray area of your stripe1 layer. Copy and paste paper of choice. Selections, invert, delete. Selections, select none. Using your magic wand again, click inside the darker gray area of your stripe1 layer. Add new raster layer and flood fill with black. Selections, select none. Delete your original stripe1 layer and bring your color paper below the black frame layer and add drop shadow of choice to the black frame layer. Do this same process for stripe layer2 and 3, using different colors and not forgetting to add the back frame layer along with bringing the color layer under the frame layer and adding the drop shadow.
On the top layer add your tube as a new layer, resize to your liking and add drop shadow of choice. i chose to duplicate mine and bring one below the frame O layer and erased parts of it so it looked like she was weaving in and out of the O. This part is totally up to you and takes a little play to get right.
You can then add and if need be resize any elements of choice. I used SIH_ribbonwithflowers1_JD and SIH_wordartsticker1_JD. But there are so may more elements that you can add to yours. Add drop shadows of choice to your elements.
Add your copy right info. Add your name. All done!!!
Hope you've enjoyed this tut.
Hugs, Dawn
littlefieldswife@yahoo.com
Hope you've enjoyed this tut.
Hugs, Dawn
littlefieldswife@yahoo.com


No comments:
Post a Comment