Wednesday, April 29, 2009

Cathing up on Awards...

Sorry its taken me so long to get this posted. I truely appreciate those who have given it to me and I'm very honored!!! It means alot to me and I thank you. I have received this award from TRACEY, ROBIN and SYLVIE. Thanks girls, ya'll ROCK. Luvs Ya!!! Please visit their amazing blogs by clicking on their linked name.


The rules of this award is to place it on your blog along with the name and link to those who have given you the award and pass it on to 10 other blogs that you think are magically. Sorry if this is a repeat for anyone.


I pass this on to:

2. Mar at ScrappingMar
3. Jessica at Scraps By Jessica
4. Kay at KayXclusive
5. RebelChick at Whispers Of A Memory
6. Tammy at Tammy's Scraps
7. LadyQueen at LadyQueens PSP Creations
8. Beaches at Blame Beaches
9. Ali at Designs By Ali
10. Pimptress at Pimp'd Designz

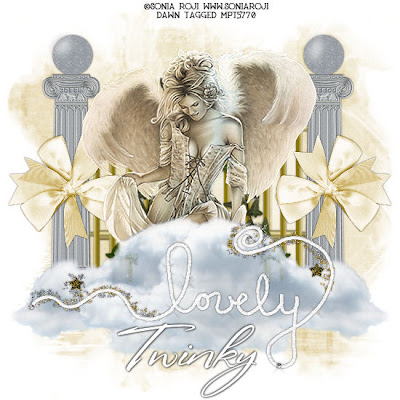
Another tag made using Twinky's amazing scrap kit Angels Amongst Us

CLICK ON TAG TO VIEW FULL SIZE
BEAUTIFUL KIT CAN BE FOUND AT SCRAPS WITH ATTITUDE HERE.

NEW TUTORIAL ~ ANGELS WATCHING OVER US

ANGELS WATCHING OVER US
STUNNING SCRAP KIT CALLED AMGELS AMONGST US BY TWINKY
CLICK ON TAG TO VIEW FULL SIZE

For this tutorial I am using the beautiful work of Sonia Roji (I believe this tube is no longer available) but there are many other beautiful ones that would work as well. You can purchase Sonia Roji's work at MPT HERE.
Stunning scrap kit by Twinky called Angels Amongst Us and you can purchase this kit at Scraps With Attitude HERE.
Mask 09 by Yarrow that you can get from her site HERE.
Lets get started:
Open a new working canvas 550x550 and flood fill white. Copy and paste paper of choice, I used Twinky_AngelsAmongstUs_Paper9. Then go to layers, new mask layer, from image, from your drop down menu choose Mask 09 by Yarrow, click OK. On your layers pallet on the right click on your original mask and merge group.
Copy and paste Twinky_AngelsAmongstUs_Gates and resize and drop shadow to your liking.
Copy and paste your tube of choice and resize and drop shadow to your liking.
Copy and paste Twinky_AngelsAmongstUs_Cloud1 above your tube layer. I duplicated mine a few times and resized and placed around my tube.
Add any other elements of choice that you would like, there are many beautiful ones to chose from. I also added, Twinky_AngelsAmongstUs_Bow1 and Twinky_AngelsAmongstUs_Lovely.png. Resize and add drop shadow of choice.
Add your copy right info. Add your name. All done!!!Hope you've enjoyed this tut.
Hugs, Dawn

Tuesday, April 28, 2009

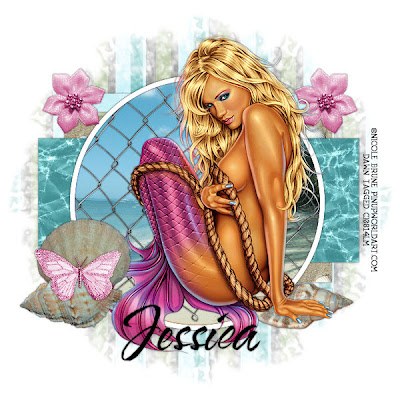
NEW TUTORIAL ~ SERINA

SERINA
BEAUTIFUL SCRAP KIT VICKY BY JESSICA
CLICK ON TAG TO VIEW FULL SIZE

For this tutorial I am using the gorgeous work of Nicole Brune which you can purchase from CILM HERE.
I am using a beautiful scrap kit called Vicky from Jessica and you can visit her blog HERE. It is a PTU kit so I can not supply it. But please go to her site and check out this kit along with the many other beautiful kits she has.
Template #44 from Sara at Sara's Scraps which you can find on her blog HERE.
WSL Mask 4 from Chelle at Weescotslass HERE.
Any beach scene of choice.
OK Lets get started.
On Sara's template #44, delete copy right layer, go to image, free rotate, to the right by 90 degrees, all layers checked.
Add a new raster layer and flood fill white and bring this layer to the bottom under all the template layers.
On top of your white background layer, copy and paste a paper of choice I used V_TS_paper 20_JD. Go to layers, new mask layer, from image, from your drop down menu choose WSL_Mask4, click OK. On your layers pallet on the right click on your original mask and merge group. I lowered the opacity of my mask to 75.
Click on your frame layer and add drop shadow of choice.
Click on your frame background layer, selections, select all, float, defloat and copy and paste your beach scene of choice. Selections, invert and delete on your keyboard. Delete your original frame background layer. On your new beach scene you can colorize to your liking to match your tube or other colors used in your tag.
I copied and pasted V_net1_JD as a new layer above my beach scene but below my frame layer.
On rectangle 2, selections, select all, float, defloat, copy and paste paper of choice, I used V_TS_paper 11_JD. Selections, invert, delete on your keyboard. Selections, select none, add drop shadow of choice. Delete the original rectangle 2 layer.
On rectangle 1 layer, selections, select all, float, defloat, copy and paste paper of choice, I used V_TS_paper 19_JD. Selections, invert, delete on your keyboard. Selections, select none, add drop shadow of choice. Delete the original rectangle 1 layer.
On thin rectangle 1, selections, select all, float, defloat, copy and paste paper of choice, I used V_TS_paper 12_JD. Selections, invert, delete on your keyboard. Selections, select none, add drop shadow of choice. Delete the original thin rectangle 1. Repeat this same process for thin rectangle 2 using the same paper.
Add tube of choice and drop shadow.
Add elements of choice, resizing and coloring to your liking. I used V_butterfly4_JD(colorized to match my tube), V_fabricflower2_JD(colorized to match my tube), V_shell1_JD, V_shell2_JD and V_shell5_JD.
There are so many more wonderful and beautiful elements and papers in this kit!!!
Add your copy right info.
Add your name.
All done!!
Hope you've enjoyed this tut.
Hugs, Dawn

Monday, April 27, 2009

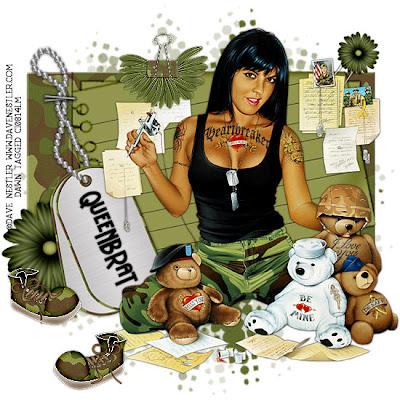
NEW TUTORIAL ~ MISSIN MY HERO

MISSIN MY HERO
AMAZING PTU KIT BY QUEENBRAT
BOOTS ON THE GROUND
CLICK ON TAG TO VIEW FULL SIZE

For this tutorial I am using the awesome work of Dave Nestler and you can purchase his work at CILM HERE.
I am using an amazing scrap kit from QueenBrat called Boots On The Ground which covers all military and you can purchase this kit at Scraps With Attitude HERE.
Vix Mask 147 which you can get from her site HERE.
Lets get started, this should be a pretty quick one.
Open a new image 550x550 and flood fill white. Copy and paste paper of choice from the kit, I used Green QBD_BootsOnTheGround_Paper14. Go to layers, new mask layer, from image, from your drop down menu choose Vix Mask 147, click OK. On your layers pallet on the right click on your original mask and merge group.
Copy and paste Green QBD_BootsOnTheGround_Journal03 on top of your mask and resize to a liking of your choice. I made mine a little bigger.
Copy and paste tube of choice and place to your liking.
Copy any elements of choice and place to your liking, I used, Green QBD_BootsOnTheGround_Binderclip03 and Green QBD_BootsOnTheGround_Boots03.
Add a drop shadow of your liking to your tube and elements.
Resize your tag to your liking.Add copy right info.Add your name.
All done!!
Hope you've enjoyed this tut.
Hugs, Dawn
littlefieldswife@yahoo.com

NEW TUTORIAL ~ GLAM ROCK STAR

GLAM ROCK STAR
Great PTU kit by Ali
Click on tag to view full size

For this tutorial I am using the awesome work of Tyson McAdoo which you can purchase from MPT HERE.
I am using an amazing scrap kit by Ali called GLAM ROCK at Scraps With Attitude which you can purchase HERE.
Vix Mask 232 which you can get from her site HERE.
OK lets get started:
Open all supplies your gonna use in PSP.
Open up a new image 550x550 (you can resize later if wanted).
If not already done, flood fill your background white.
Copy and paste paper of choice, I used DBA PAPER 1.
Go to layers, new mask layer, from image, from your drop down menu choose Vix Mask 232, click OK. On your layers pallet on the right click on your original mask and merge group. you can lower the opacity of this mask layer if you would like, I did mine at 75 opacity.
Copy and paste frame of choice on top of your mask, I used DBA FRAME 2. Using your magic wand click inside the circle part of your frame. Then go to selections, modify, expand, by 5. With mine I added a new layer and flood filled white so that I could lower the opacity of my paper once added and it wouldnt show through. Selections, select none and then bring your white circle under your frame. Once again using your magic wand click in the circle part of your frame. Selections, modify, expand by 5. Copy and paste paper of choice, I used DBA PAPER 20. Selections, invert and delete on your keyboard to get rid of the excess. Selections, select none. Drop this layer below your frame layer but above the white circle layer. I dropped the opactiy of this layer to 70.
Add your tube!
Add any elements of choice, I used DBA BASS GUITAR 1, DBA MICROPHONE 1, and DBA WORD ART 2.
Drop shadow tube and all elements including frame with a drop shadow of choice.
Resize your tag to your liking.Add copy right info.Add your name.
All done!!
Hope you've enjoyed this tut.
Hugs, Dawn
littlefieldswife@yahoo.com

Friday, April 24, 2009

NEW TUTORIAL ~ ETERNAL ROUTE 66

ETERNAL ROUTE 66
AWESOME PTU KIT BY MAR CALLED ROUTE 66
CLICK ON TAG TO VIEW FULL SIZE

For this tutorial I am using the amazing works of Dave Nestler and you can purchase his work at CILM HERE.
I am using an awesome scrap kit by Mar from Scrapping Mar which is a PTU kit called Route 66 and you can find that on her blog HERE.
Template #33 by Pooker from Pookers Creations and you can find her templates on here blog HERE.
Vix Mask 147 which you can get from her site HERE.
OK lets get started. Open up Pookers template #33 and delete the copy right layer. Go to image, canvas size, 600x600. (You can resize later if you want). Flood fill the bottom layer with white to fill in the gaps after making the canvas bigger.
On top of your bottom white layer, add a new raster layer. Copy and paste paper of choice, I used Paper 7. Go to layers, new mask layer, from image, from your drop down menu choose Vix Mask 147, click OK. On your layers pallet on the right click on your original mask and merge group. you can lower the opacity of this mask layer if you would like, I did mine at 75 opacity. Add a new raster layer on top of the mask layer you just did. Make your foreground color #96413c and your background color #4e5275. Click on your foreground color and make it a gradient Angle:45, Repeats:3. OK. Flood fill your new raster layer with this gradient. Go to layers, new mask layer, from image, from your drop down menu choose Vix Mask 147, click OK. On your layers pallet on the right click on your original mask and merge group. You can also lower the opacity of this layer as well if you would like, I also did 75 on this one as well. With this mask layer you will go to image, flip, image, mirror.
On your rectangle 1 go to selections, select all, float, defloat and copy and paste paper of choice, I used Paper 14. Selections, invert, delete on your keyboard, selections, select none. Delete the original rectangle 1 layer. On your new rectangle 1 layer go to Adjust, Add/Remove noise...Add noise with settings: Uniform, Noise 30%, Monochrome checked and then add drop shadow of choice.
On the white ring layer just add a drop shadow of choice.
On rectangle 2 layer go to selections, select all, float, defloat and copy and paste paper of choice, I used Paper 3. Position in your selection where you want your paper to be and the parts you want showing. Selections, invert, delete on your keyboard, selections, select none. Delete the original rectangle 2 layer and add a drop shadow of choice to your new rectangle 2 layer.
Click on strip 1, selections, select all, float, defloat. Add a new raster layer and flood fill with black. Selections, select none. Delete original strip 1 layer and add a drop shadow of choice to your new strip 1 layer. Do the same exact thing for strip 2.
On the circle layer, selections, select all, float, defloat and copy and paste paper of choice, I used Paper 13. Selections invert and delete on your keyboard. While my circle layer was still selected I copied and pasted a part of a tube into the circle as well and hit delete on my keyboard to get rid of the excess. Selections, select none. I then changed the blend mode on that tube layer to luminance legacy. Delete the original circle layer and drop shadow your new circle layer.
I then closed off my white background layer and both mask layers and merged visible. Open back up the layers you just closed off. On your merged layer, image, resize, width and height 115. Make sure you dont have all layers checked.
Copy and paste your tube and add drop shadow of choice.
Resize your tag to your liking.
Add copy right info.
Add your name.
All done!!
Hope you've enjoyed this tut.
Hugs, Dawn

Thursday, April 23, 2009

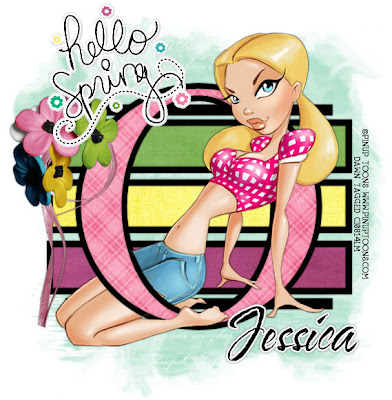
NEW TUTORIAL ~ PRETTY MISS SPRING THING

PRETTY MISS SPRING THING ~ USING SPRING INTO HAPPINESS KIT BY JESSICA
CLICK ON TAG TO VIEW FULL SIZE

For this tutorial I am using the amazing works of Pinup Toons which you can purchase from CILM HERE.
I am using an awesome scrap kit called Spring Into Happiness from Jessica and you can visit her blog HERE. It is a PTU kit so I can not supply it. But please go to her site and check out this kit along with the many other beautiful kits she has. There is so much more to this spring kit than you see in my tag.
Template #43 from Beth at Blissfully Beth and you can download the template from her blog HERE.
Mask 09 by Yarrow that you can get from her site HERE.
Lets get started.
On your template #43 delete copy right layer.
Drop shadow your O frame and your black stripes with a drop shadow of choice.
On your bottom white layer copy and paste a paer of choice above this layer. I used SIH_paper15_JD. Then go to layers, new mask layer, from image, from your drop down menu choose Mask 09 by Yarrow, click OK. On your layers pallet on the right click on your original mask and merge group. I lowered the opacity and resized mine a bit but thats totally up to you.
On your O frame background, selections, select all, float, defloat and copy and paste paper of choice, I used SIH_paper11_JD. Go to selection, invert and hit delete on your keyboard. Selections, select none and delete frame background layer.
Using your magic wand click inside the lighter gray area of your stripe1 layer. Copy and paste paper of choice. Selections, invert, delete. Selections, select none. Using your magic wand again, click inside the darker gray area of your stripe1 layer. Add new raster layer and flood fill with black. Selections, select none. Delete your original stripe1 layer and bring your color paper below the black frame layer and add drop shadow of choice to the black frame layer. Do this same process for stripe layer2 and 3, using different colors and not forgetting to add the back frame layer along with bringing the color layer under the frame layer and adding the drop shadow.
On the top layer add your tube as a new layer, resize to your liking and add drop shadow of choice. i chose to duplicate mine and bring one below the frame O layer and erased parts of it so it looked like she was weaving in and out of the O. This part is totally up to you and takes a little play to get right.
You can then add and if need be resize any elements of choice. I used SIH_ribbonwithflowers1_JD and SIH_wordartsticker1_JD. But there are so may more elements that you can add to yours. Add drop shadows of choice to your elements.
Add your copy right info. Add your name. All done!!!
Hope you've enjoyed this tut.
Hugs, Dawn
littlefieldswife@yahoo.com

NEW TUTORIAL FTU KIT ~ SOLDIERS GIRL

SOLDIERS GIRL
CLICK ON TAG TO VIEW FULL SIZE
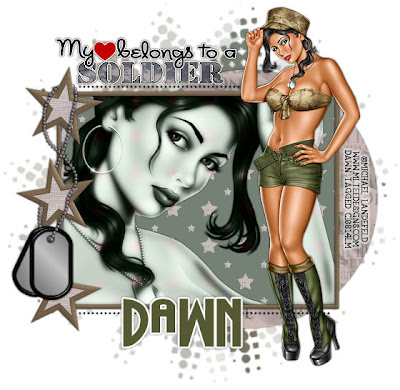
For this tutorial I am using the wonderful work of Michael Landefeld and you can purchase this work at CILM HERE.
My Soldiers Girl Supplies which includes the dog tags and word art which original comes from my Military Collab kit. If you just want the dog tags and word art for this tut I have zipped them together and you can download from my 4shared HERE. If you would like the whole Military Collab kit you can download that from my 4shared as well HERE.
Template 13 by Missy at Divine Intentionz HERE.
Vix Mask 147 which you can get from her site HERE.
OK as far as the scrap kit, it is a FTU scrap kit, it is a full sized kit so you will have to resize your layers to your liking. I downloaded this kit long ago and have searched high and low for the site that I originally got it from. The kit is called A4LD-LETTERS HOME. It is a kit created by Jessica Lopez from All 4 Love Designs. I've searched every different aspect I could think of to find the site. I emailed the email on the TOU but havent heard back yet. So as of right now I've uploaded the kit to my 4shared and will leave it that way until I find out the site to go to. If you know this info I would greatly appreciate it. Thank you.
FROM MY 4 SHARED...
Delete Missy's copy right layer on template 13. Then go to image, canvas size 600x600. Flood fill your bottom/background layer with white to fill in the extra.
Add a lew raster layer above this layer. In your color pallette make your foreground #79644d (or color of choice). Background #768175 (or color of choice). Click on your foreground layer, gradient, Angle 45, Repeat 3. Flood fill your new raster layer with this gradient. Go to layers, new mask layer, from image, from your drop down menu choose Vix Mask 147, click OK. On your layers pallet on the right click on your original mask and merge group.
Click on circle layer on Missy's template. Selections, select all, float, defloat, copy and paste paper of choice, I used paper 4. Selections, invert, delete on your keyboard. Selections, select none. Delete original circle layer and add drop shadow of choice to your new circle layer.
Click on frame rectangle. Selections, select all, float, defloat, copy and paste paper of choice, I used Paper 2. Selections, invert, delete on your keyboard. Do not deselect yet. Copy and paste close up tube of choice. I made my close up at 100% opacity and mirrored my image (just adding this in case you use the same tube). Place inside frame area and hit delete on tube to get rid of excess. Selections, select none and delete your original frame rectangle layer. Add a drop shadow of choice to both your new frame rectangle layer and tube layer. On your tube layer go to effects, plugins, xero, radiance with this setting:
Strangeness - 128Charm - 50Truth - 128Beauty - 255
(The above process is optional)
Change your blend mode on your tube to luminance legacy.
On your lines, add drop shadow of choice.
Click on your rectangle frame, selections, select all, float, defloat. Add new raster layer and flood fill with color of choice. I used #877159. Selections, select none. Delete your original rectangle frame. On the new rectangle frame I added an inner bevel by going to effect, 3D effects, Inner Bevel with the following settings:
Bevel #2
Width: 10
Smoothness: 9
Depth: 2
Ambience: 0
Shinniness: 20
Color: White
Angle: 43
Intensity: 30
Elevation: 55
Add drop shadow of choice.
Click on the small stars layer, selection, select all, float, defloat, copy and paste paper of choice, I used Paper1. Selections, invert, delete on your keyboard. Selections, select none. Delete your original small stars layer and add a drop shadow of choice.
Click on the large stars layer, selections, select all, float, defloat, add new raster layer and flood fill with olor of choice, I used #877159. Selections, select none. Delete your original large stars layer. I also added an inner bevel to the large stars layer using the same settings as above. Add drop shadow of choice.
Copy and paste main tube of choice, I mirrored mine. Place where you think looks best. Add drop shadow of choice.
Add your dog tags and word art if you'd like. Resize as needed. Add drop shadow of choice. I placed my dog tags on top of the stars layers and erased parts of it so it looks like it was weaving through it.
Resize your tag to your liking.
Add copy right info.

Add your name.
All done!!
Hope you've enjoyed this tut. Hugs, Dawn
littlefieldswife@yahoo.com

Wednesday, April 22, 2009

NEW TUTORIAL FTU KIT ~ GOLDEN SUMMER FAE

GOLDEN SUMMER FAE(TUT NAMED BY MY GOOD FRIEND CATHY, TY)
CLICK ON TAG TO VIEW FULL SIZE

I'm using the amazing and beautiful work of Zindy and you can purchase her work at her shop HERE.
I am using a beautiful FTU scrap kit by Bel Vidotti called Tatiana and you can get this kit from her blog HERE.
Template 199 by Missy at Divine Intentionz HERE.
Vix Mask 218 which you can get from her site HERE.
Delete the copy right layer on Missy's template 199. Go to image, canvas size 550x550, you can resize or crop later if wanted. Flood fill the bottom white layer with white to fill in the extra parts after making the canvas bigger.
On top of your white bottom layer copy and paste a paper of choice, I used BVS Friendship Tatiana Paper01. Go to layers, new mask layer, from image, from your drop down menu choose Vix Mask 218, click OK. On your layers pallet on the right click on your original mask and merge group. Move , pick, do what you'd like to place your mask where you think looks best. I picked mine by moving the width out and then moving the mask up.
Click on the background frame (pink) layer of the template. Go to selections, select all, float, defloat and copy and paste paper of choice, I used BVS Friendship Tatiana Paper01. Selections, select none. Delete original background frame layer. On your new background frame laer go to Effects, Texture Effects, Bricks with these settings:
Size: 29
Smoothness: 12
Depth: 1
Ambience: 0
Shininess: 0
Color: White
Intensity: 50
Elevation: 30
Click on your frame and just add a drop shadow of choice.
Click on circle 1, selections, select all, float, defloat. Copy and paste paper of choice, I used BVS Friendship Tatiana Paper09. Selections, invert, delete on your keyboard. Delete original circle 1 layer. Add a drop shadow of choice to your new circle layer. Do the same thing for circle 2 using the same paper or different one if you'd like.
Click on thin rectangle 1, selections, select all, float, defloat. Copy and paste paper of choice, I used BVS Friendship Tatiana Paper04. Selections, invert, delete on your keyboard. Delete original thin rectangle 1 layer. Add a drop shadow of choice to your new thin rectangle 1 layer. Do the same for thin rectangle 2 using the same paper or different one if you'd like.
Click on thin rectangle 3, selections, select all, float, defloat. Add new raster layer and flood fill this layer with color of choice, I used #008000. I also added penta.com, color dot to my layer. Or you can use a paper of choice. Delete original thin rectangle 3 and add a drop shadow of choice to your new thin rectangle 3. Do the same for thin rectangle 4.
Copy adn paste your tube of choice on top of all layers. I applied xero/porcelain to my tube and added a drop shadow.
Add any elements of choice. I used BVS Friendship Tatiana Bow02 but selected a part of the sunflower from my tube to add on top of my bow.
Add your copy right info.
Add your name.
All done!!
Hope you've enjoyed this tut. Hugs, Dawn
littlefieldswife@yahoo.com

NEW TUTORIAL ~ WHEN YOUR GONE ~ USING A FTU KIT

WHEN YOUR GONE
FTU KIT
CLICK ON TAG TO VIEW FULL SIZE.
OK this should be a pretty easy one.
I'm using the amazing and beautiful work of Zindy and you can purchase her work at her shop HERE.
I'm using a gorgeous scrap kit by Bluey from Blue Dream Designs called Delicious and it is a FREEBIE and you can pick that up at her blog HERE.
Template 196 by Missy at Divine Intentionz HERE.
Vix Mask 147 which you can get from her site HERE.
Font of choice.
Plugins used: xero radiance and eye candy gradient glow 4000 (optional)
Ok lets get started.
Open Missy's template 196, delete copy right layer. Go to image, free rotate, left, 90.00 all layers checked. Go to image, canvas size 550x550 and flood fill you bottom layer white so it fills in the parts after making the canvas bigger.
On top of your white bottom layer, go to layers, add new raster layer and copy and paste paper of choice, I used BD-Delicious-Paper7.
Go to layers, new mask layer, from image, from your drop down menu choose Vix Mask 147, click OK. On your layers pallet on the right click on your original mask and merge group.
Click on rectangle 3 of the template. Layers, select all, float, defloat. Copy and paste paper of choice, I used BD-Delicious-Paper4. Go to selections, invert and hit delete on your keyboard. Do not deselect just yet. Copy and paste your tube of choice inside the selection and once you have it placed where you like it, hit delete on your keyboard. Then go to selections, select none. Delete your original rectangle 3 layer and add a drop shadow of choice to your new rectangle 3 layer and also your tube layer. On your tube layer go to effects, plugins, xero, radiance with this setting:
Strangeness - 128
Charm - 50
Truth - 128
Beauty - 255
(The above process is optional)
Click on rectangle1, selections, select all, float, defloat. Copy and paste paper of choice, I used BD-Delicious-Paper3. Selections, invert and hit delete on your keyboard. Selections, select none and add drop shadow of choice. Do the same for rectangle 2. Delete your original rectangle 1 and 2 layers.
Click on thin rectangle 1, selections, select all, float, defloat. Copy and paste paper of choice, I used BD-Delicious-Paper1. Selections, invert and hit delete on your keyboard. Do the same for thin rectangle 2. Add drop shadow of choice to both and delete both original thin rectangle layers.
Add any wording and elements of choice. I used BD-Delicious-Flower3 and BD-Delicious-Bead String1.
Add your copy right info.
Add your name.
All done!!
Hope you've enjoyed this tut. Hugs, Dawn

Tuesday, April 21, 2009

NEW TUTORIAL ~ HAMMOND GIRLZ ROCK

HAMMOND GIRLZ ROCK ~ KIT BY TWINKY
PLEASE CLICK ON TAG TO VIEW FULL SIZE

For this tutorial I am using the wonderful work of Ted Hammond and you can purchase his work at CILM HERE.
I am using an awesome scrapkit by Twinky called Girlz Rock which you can purchase at Scraps With Attitude HERE.
You will also need Vix Mask 143 which you can get from her site HERE.
Template 200 by Missy at Divine Intentionz HERE.
Font of choice, I used Stephanie Marie.
On Missy's template 200 go to image, canvas size, 550x550. Delete copy right layer.
Add new raster layer and flood fill with white and bring to the bottom under the template. Layers, new raster layer above your white layer. Copy and paste paper of choice from the kit, I used Twinky_GirlzRock_Paper7. Go to layers, new mask layer, from image, from your drop down menu choose Vix Mask 143, click OK. On your layers pallet on the right click on your original mask and merge group.
Click on the star background layer, go to selections, select all, float, defloat. Copy and paste paper of choice, I used Twinky_GirlzRock_Paper7. Go to selection, invert and hit delete on your keyboard. Selections, select none and delete original star background layer. Add drop shadow of choice to your star background layer.
Click on star background and add a drop shadow of choice that will highten the background.
Click on the star layer, selections, select all, float, defloat. Copy and paste paper of choice, I used Twinky_GirlzRock_Paper13. Go to selection, invert and hit delete on your keyboard. Selections, select none and delete original star layer. Add drop shadow of choice to your star layer.
Click on circle layer, selections, select all, float, defloat. Copy and paste paper of choice, I used Twinky_GirlzRock_Paper5. Go to selection, invert and hit delete on your keyboard. Selections, select none and delete original circle layer. Add drop shadow of choice to your circle layer.
Click on the dotted circle layer, selections, select all, float, defloat. Copy and paste paper of choice, I used Twinky_GirlzRock_Paper6. Go to selections, invert and hit delete on your keyboard. Delete original dotted circle. Add drop shadow of choice to your dotted circle layer.
Copy and paste tube of choice and resize if needed. You can then add any elements of choice. I used Twinky_GirlzRock_SafetyPin1 and Twinky_GirlzRock_Wordart1. Resize the elements you use to your liking. Add your copy right info. Add your name. All done!!!
Hope you've enjoyed this tut.
Hugs, Dawn

Saturday, April 18, 2009

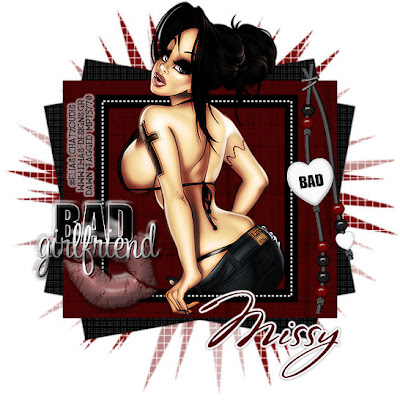
NEW TUTORIAL~ ELIAS BAD GIRLFRIEND

ELIAS BAD GIRLFRIEND
PLEASE CLICK ON TAG TO VIEW FULL SIZE
For this tutorial I am using the wonderful art work of Elias Chatzoudis which you can purchase from MPT HERE.
I am using the amazing scrap kit Bad Girlfriend by Missy at Scraps With Attitude which you can purchase HERE.
You will also need Vix Mask 143 which you can get from her site HERE.
Template 165 by Missy at Divine Intentionz HERE.
Filters used penta.com and eye candy 4000(for the name) and xero radiance (all optional).
Font of choice, I used Stephanie Marie.
On Missy's template 165 go to image, canvas size, 600x600. Add new raster layer and flood fill with white and bring to the bottom under the template. Layers, new raster layer above your white layer. Flood fill with color of choice, I used #780e0e. Go to layers, new mask layer, from image, from your drop down menu choose Vix Mask 143, click OK. On your layers pallet on the right click on your original mask and merge group.
Click on square 2 on Missy's template, go to selections, select al, float, defloat. Copy and paste paper of choice from your kit, I used Bad Girlfriend_Paper 3. Go to selection, invert and hit delete on your keyboard. Selections, select none. Delete your original square 2 layer.
Merge square 1 and square 3 together. Selections, select all, float, defloat. Layers, new raster layer and flood fill with color of choice, I used black and then applied pents.com/dot and cross (optional). Settings:
Amount -72
Cross distance - 10
Cross width - 2
Apply drop shadow of choice.
Add a drop shadow of choice to your dotte square.
Copy and paste your tube of choice and resize if needed. I resized mine by 95%. Add drop shadow of choice. Move your tube into position where you think looks best. I added xero radiance to my tube. Settings:
Strangeness - 128
Charm - 50
Truth - 128
Beauty - 255
I then duplicated my tube and moved one below the frame layer. I closed off my top tube layer so that I could erase any over hanging of my bottom tube layer. I then opened the top tube layer back up and erased any parts hanging over the frame layer and left her hand hanging over by closely erasing around it.
Add a drop shadow of choice to your frame layer.
You can then add any elements of choice. I used Bad Girlfriend_Word 2 and Bad Girlfriend_Bead Heart String 1.
Add your copyright info.
Add your name.
All done!!!
Hope you've enjoyed this tut.
Any questions email me at littlefieldswife@yahoo.com
Hugs, Dawn

Wednesday, April 15, 2009

NEW AWARD ~ I LOVE YOUR BLOG


I received this wonderful award from the amazing Mercy at Tutorials By Mercy. Thank you so very much hun, it really means alot!!! Been awhile since I've received an award. HUGS
I would like to pass this on to:
2: Sylvie at SYLLY CREATIONZ
3: Robin at JR. BABES MESS
Please pass this on to 3 other deserving bloggers.
HUGS


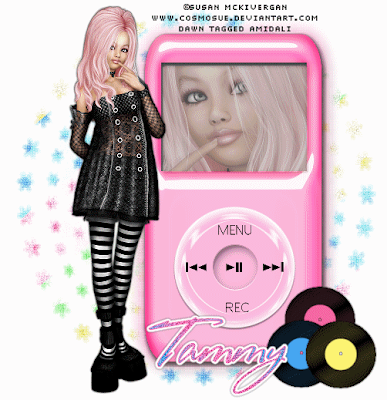
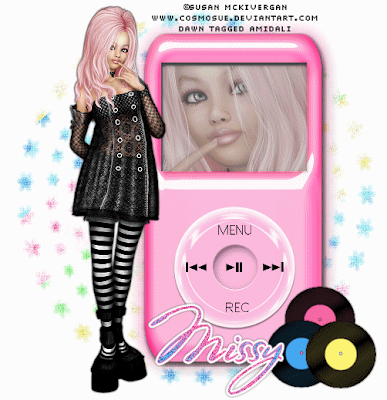
NEW TUTORIAL ~ MY POD

Tag is animated, click HERE to see it as animated.


For this tutorial I am using the wonderful artwork of Susan McKivergan and you can purchase her work at Artistic Minds Inc HERE. Or tube of choice and a closeup image of choice. Font of choice. Mask of choice, I am using EBD Mask2 (in my supplies) by Rachel. I have tried finding her site to get a link but each one I click on tells me its not available so if someone has that I would love to know so I could link to her. My supplies HERE (mask). The scrap kit I'm using is an Exclusive Scrap Kit from Missy and Tammy at Scraps With Attitude called Teen Love and you can purchase it HERE. Its a wonderful kit!!!
Open all your supplies in PSP and minimize for now. Open a new image 505x520. Layers, new raster layer and flood fill white. Take one of your papers or color/gradient of choice, I used Teen Love Tammy's Scraps _ Paper 6, copy and paste as a new layer. Go to Layers, new mask layer, from image and find your EBD Mask2 from the drop down and click OK. Right click on your original mask over in your layers pallet on the right, merge, merge group. Open up Teen Love_MP3 Player 1 or one of your liking. Resize to your liking and copy and paste onto your working canvas. Using your magic want click inside the grey area of the MP3 Player. Selections, modify, expand by 1. Copy and paste your close up image or tube of choice into the selection area. Go to selection, invert, delete. Add a dropsahdow of choice and lower the opacity to your liking. Copy and paste main tube of choice and place it next to the MP3 player, resize to your liking and add dropshadow of choice. Add any other elements of choice, resizing and dropshadowing to your liking. Add your copyright info. You can then add your name or animate yours like I did mine if you would like. Either way I think looks fine. If you would like the animated instructions please let me know and I'll try my best to explain, lol. I'm still getting used to the tut writing. I appreciate any constructive criticism.
littlefieldswife@yahoo.com

Tuesday, April 14, 2009

Tag I made using a tut by Missy at Divine Intentionz

Here Come The Girls, a tut by Missy at Divine Intentionz
Click on tag to view full size.
Loved this tut Missy!!!

SCRAPS WITH ATTITUDE CT CALL!!!!

Please click on tag to enlarge!!!

NEW TUT COMING SOON: MY POD


Tag is animated, click HERE to see it as animated. Please click on tag to view full size. This tag was created using the wonderful Exclusive kit by Tammy and Missy at Scraps With Attitude HERE called Teen Love. I will get the tut written up ASAP. I had another doctor visit today and feeling a bit down so I will try and get to it soon. I at least wanted to get the preview posted so you know its coming, lol.
Hugs, Dawn

Friday, April 10, 2009

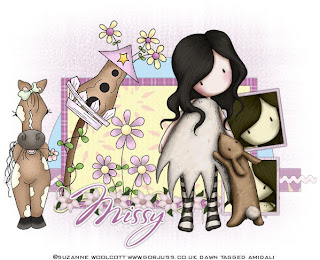
NEW TUTORIAL ~ GORGEOUS SPRING

Click on tag to enlarge.
This is only my second tut so if I missed something somewhere please let me know.
For this tutorial I am using the wonderful work of Suzanne Woolcott. To use her work you must purchase a license and tube/s and you can do that at GorjussArt.com HERE . Font of choice, I am using Stephanie Marie. Mask of choice, I am using EBD Mask55 (in my supplies) by Rachel. I have tried finding her site to get a link but each one I click on tells me its not available so if someone has that I would love to know so I could link to her. I used the wonderful and adorable scrap kit Darlings of Spring by Missy. You can purchase this kit at Scraps With Attitude HERE. My supplies (mask by Rachel) HERE. Template #29 by Sarah, you can find her blog HERE.
Lets get started. Remember to save often.
Open your tube, mask, etc and minimize in PSP for now.
Open template #29, image, canvas size 700x600 (you can resize later). Delete the copyright layer, the heart layer and the wordart layer on the template. Click on the very last layer of the template. Go to layers, new raster layer, OK. After adding this layer bring it down to the bottom under all the template layers and flood fill this layer white.
Copy and paste paper of choice, I used paper #30 from the Darlings of Spring kit onto your canvas on top of your white flood filled layer you just did. Go to Layers, new mask layer, from image and find your EBD Mask55 from the drop down and click OK. Right click on your original mask over in your layers pallet on the right, merge, merge group. Highlight the template half circle, selections, select all, float, defloat. Add new raster layer. Select your flood fill tool and flood fill this layer with color or scrap of choice, I used #c2e3f6. Selections, select none. Then delete the original half circle. Continue to do this for all template layers in your colors or scraps of choice. Using your magic wand click inside frame 1, selections, modify, expand by 4. Copy and paste a tube of choice into this selections. Selections, invert, delete. I think changed the blend mode of my tube to luminance legacy. Repeat this process for frame 2. Copy and paste your tube of choice and place where you like it. Add any elements of choice. I used Darlings of Spring Horse, Darlings of Spring Flowers and Darlings of Spring Flower Ribbon 1. You can then add your copyright info and name and resize to your liking. I resized mine 599x486. I hope you've enjoyed this tut. If you have any questions please feel free to email me at littlefieldswife@yahoo.com.

Saturday, April 4, 2009

Re-Upload of Military Collab Kit for PSP 7 and Up


Hey everyone, sorry to those who havent been able to open up the parts of this kit. When I saved everything it was in PSPX form so if you are using a version lower it was unopenable. I have went through and resaved everything in PSP7 form so as long as you are using 7 and above it should open for you. I am so sorry and will hopefully remember from now on. I hope by doing this everyone will be able to open it up. I would love to see any vreations you might make from it. Hugs, Dawn littlefieldswife@yahoo.com
You can download it HERE.

BLOG LAYOUT REQUEST?

I was wondering if by chance someone could help me out with a blog layout? I have no idea how to make them and I just end up making a mess, lol. I wanted a change so I did what I have up now which is just blah. So I would be extremely grateful if someone could help me out. I could even gift a few tubes your way. Please help me, lol. Hugs, Dawn