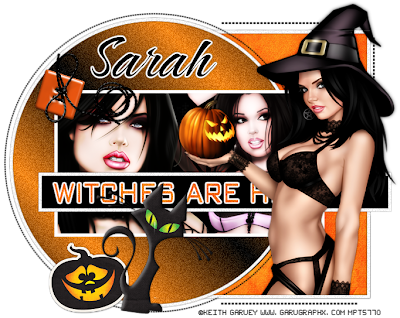
WITCHES ARE HEXY

This tutorial was written by myself, Dawn on September 30, 2009. Any similarities to any other tutorials is purely coincidental.
Still a bit new to the tutorial writing and its been awhile since I've done one so hope its OK.
Supplies Needed:
Tube of choice. I'm using the work of the amazing Keith Garvey and as of now you can find his work at MPT HERE.
Scrap kit, H A double L O double U double E N by Sarah at Pimp My Tags With Scraps HERE
Font of choice. I am using Caramel Nuggets.
Template ~ Witches Are Hexy template made by me which you can also get from my blog HERE.
Eye Candy 4000 ~ optional
Xero/Radiance ~ optional
Xero/Radiance ~ optional
DSB Flux Bright Noise ~ optional
Gaussian Blur ~ optional
OK lets get started, remember to save often.
Open all your supplies including the template in your PSP program of choice.
Delete the copyright layer from the template.
On all frame layers of the template go to Effects, Plugins, DSB Flux, Bright Noise Intensity 25 Mix, or a setting of your choice. Then add a dropshadow of choice to all frame layers.
Make a gradient color of black #000000 and orange #fb7f1a angle 45, repeat 3 and make as your foreground color. Click on the circle layer of the template, selections, select all, float, defloat. Add a new raster layer and flood fill with your gradient. Selections, select none. Effects, Plugins, DSB Flux, Bright Noise, Intensity 25 Mix or a setting of your choice. Add dropshadow of choice to this layer and then delete the original circle layer. Click on the large rectangle layer, selections, select all, float, defloat. Copy and paste sb_halloween_pp1 from the kit, selections invert, delete. Selections, select none. Delete the original large frame layer. Click on the medium rectangle layer of the template, selections, select all, float, defloat, add new raster layer and floodfill with black #000000, selections, select none. Delete the original medium rectangle layer. Using your magic wand click in the middle of the medium rectangle frame layer. Selections, modify, expand by 3. Take 2 or 3 tubes of choice, copy and paste them into your selections. Selections, invert, delete. Selections, select none. Bring tubes below frame layer. On your tubes go to, effects, plugins, xero, radiance. My settings were 128, 50, 128, 255 but play with it and use a setting of your choice.
Copy and paste your main tube of choice and place where youd like. I put mine to the right coming out of the large rectangle layer and used my selections tool to get rid of any excess of my tube that I didnt want by selecting that part and hitting delete. I then duplicated my tube and on the duplicate layer, adjust, blur, gaussian blur, radius 3, blend mode, soft light and then add a drop shadow of choice to the original tube.
Click on the wordart layer, selections, select none, float, defloat. Add new raster layer and floodfill with orange #fb7f1a. Selections, select none and delete the original wordart layer. On the new wordart layer, dsb flux, bright noise, intesity 25, mix and then add a gradient glow of choice and dropshadow of choice.
Add a dropshadow of choice to all dot layers.
Add any elements of choice from the kit. I used, sb_halloween_jack o lantern sticker2, sb_halloween_cat3, and sb_halloween_button1. Add dropshadow of choice to all elements.
Add all copyrights.
Using a font of choice, add your name. I used Caramel Nuggets.
Hope you've enjoyed the tutorial. If you have any questions, just hollar at me, lol.
Hugs, Dawn


