Wednesday, April 29, 2009

Another tag made using Twinky's amazing scrap kit Angels Amongst Us

CLICK ON TAG TO VIEW FULL SIZE
BEAUTIFUL KIT CAN BE FOUND AT SCRAPS WITH ATTITUDE HERE.

NEW TUTORIAL ~ ANGELS WATCHING OVER US

ANGELS WATCHING OVER US
STUNNING SCRAP KIT CALLED AMGELS AMONGST US BY TWINKY
CLICK ON TAG TO VIEW FULL SIZE

For this tutorial I am using the beautiful work of Sonia Roji (I believe this tube is no longer available) but there are many other beautiful ones that would work as well. You can purchase Sonia Roji's work at MPT HERE.
Stunning scrap kit by Twinky called Angels Amongst Us and you can purchase this kit at Scraps With Attitude HERE.
Mask 09 by Yarrow that you can get from her site HERE.
Lets get started:
Open a new working canvas 550x550 and flood fill white. Copy and paste paper of choice, I used Twinky_AngelsAmongstUs_Paper9. Then go to layers, new mask layer, from image, from your drop down menu choose Mask 09 by Yarrow, click OK. On your layers pallet on the right click on your original mask and merge group.
Copy and paste Twinky_AngelsAmongstUs_Gates and resize and drop shadow to your liking.
Copy and paste your tube of choice and resize and drop shadow to your liking.
Copy and paste Twinky_AngelsAmongstUs_Cloud1 above your tube layer. I duplicated mine a few times and resized and placed around my tube.
Add any other elements of choice that you would like, there are many beautiful ones to chose from. I also added, Twinky_AngelsAmongstUs_Bow1 and Twinky_AngelsAmongstUs_Lovely.png. Resize and add drop shadow of choice.
Add your copy right info. Add your name. All done!!!Hope you've enjoyed this tut.
Hugs, Dawn

Tuesday, April 28, 2009

NEW TUTORIAL ~ SERINA

SERINA
BEAUTIFUL SCRAP KIT VICKY BY JESSICA
CLICK ON TAG TO VIEW FULL SIZE
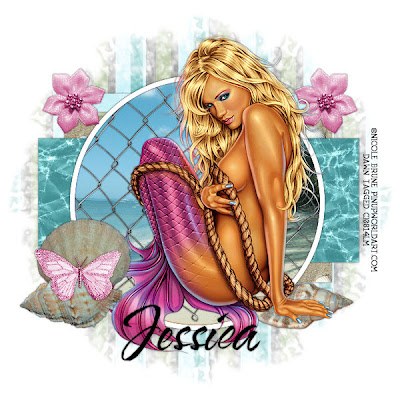
For this tutorial I am using the gorgeous work of Nicole Brune which you can purchase from CILM HERE.
I am using a beautiful scrap kit called Vicky from Jessica and you can visit her blog HERE. It is a PTU kit so I can not supply it. But please go to her site and check out this kit along with the many other beautiful kits she has.
Template #44 from Sara at Sara's Scraps which you can find on her blog HERE.
WSL Mask 4 from Chelle at Weescotslass HERE.
Any beach scene of choice.
OK Lets get started.
On Sara's template #44, delete copy right layer, go to image, free rotate, to the right by 90 degrees, all layers checked.
Add a new raster layer and flood fill white and bring this layer to the bottom under all the template layers.
On top of your white background layer, copy and paste a paper of choice I used V_TS_paper 20_JD. Go to layers, new mask layer, from image, from your drop down menu choose WSL_Mask4, click OK. On your layers pallet on the right click on your original mask and merge group. I lowered the opacity of my mask to 75.
Click on your frame layer and add drop shadow of choice.
Click on your frame background layer, selections, select all, float, defloat and copy and paste your beach scene of choice. Selections, invert and delete on your keyboard. Delete your original frame background layer. On your new beach scene you can colorize to your liking to match your tube or other colors used in your tag.
I copied and pasted V_net1_JD as a new layer above my beach scene but below my frame layer.
On rectangle 2, selections, select all, float, defloat, copy and paste paper of choice, I used V_TS_paper 11_JD. Selections, invert, delete on your keyboard. Selections, select none, add drop shadow of choice. Delete the original rectangle 2 layer.
On rectangle 1 layer, selections, select all, float, defloat, copy and paste paper of choice, I used V_TS_paper 19_JD. Selections, invert, delete on your keyboard. Selections, select none, add drop shadow of choice. Delete the original rectangle 1 layer.
On thin rectangle 1, selections, select all, float, defloat, copy and paste paper of choice, I used V_TS_paper 12_JD. Selections, invert, delete on your keyboard. Selections, select none, add drop shadow of choice. Delete the original thin rectangle 1. Repeat this same process for thin rectangle 2 using the same paper.
Add tube of choice and drop shadow.
Add elements of choice, resizing and coloring to your liking. I used V_butterfly4_JD(colorized to match my tube), V_fabricflower2_JD(colorized to match my tube), V_shell1_JD, V_shell2_JD and V_shell5_JD.
There are so many more wonderful and beautiful elements and papers in this kit!!!
Add your copy right info.
Add your name.
All done!!
Hope you've enjoyed this tut.
Hugs, Dawn

Monday, April 27, 2009

NEW TUTORIAL ~ MISSIN MY HERO

MISSIN MY HERO
AMAZING PTU KIT BY QUEENBRAT
BOOTS ON THE GROUND
CLICK ON TAG TO VIEW FULL SIZE

For this tutorial I am using the awesome work of Dave Nestler and you can purchase his work at CILM HERE.
I am using an amazing scrap kit from QueenBrat called Boots On The Ground which covers all military and you can purchase this kit at Scraps With Attitude HERE.
Vix Mask 147 which you can get from her site HERE.
Lets get started, this should be a pretty quick one.
Open a new image 550x550 and flood fill white. Copy and paste paper of choice from the kit, I used Green QBD_BootsOnTheGround_Paper14. Go to layers, new mask layer, from image, from your drop down menu choose Vix Mask 147, click OK. On your layers pallet on the right click on your original mask and merge group.
Copy and paste Green QBD_BootsOnTheGround_Journal03 on top of your mask and resize to a liking of your choice. I made mine a little bigger.
Copy and paste tube of choice and place to your liking.
Copy any elements of choice and place to your liking, I used, Green QBD_BootsOnTheGround_Binderclip03 and Green QBD_BootsOnTheGround_Boots03.
Add a drop shadow of your liking to your tube and elements.
Resize your tag to your liking.Add copy right info.Add your name.
All done!!
Hope you've enjoyed this tut.
Hugs, Dawn
littlefieldswife@yahoo.com

NEW TUTORIAL ~ GLAM ROCK STAR

GLAM ROCK STAR
Great PTU kit by Ali
Click on tag to view full size

For this tutorial I am using the awesome work of Tyson McAdoo which you can purchase from MPT HERE.
I am using an amazing scrap kit by Ali called GLAM ROCK at Scraps With Attitude which you can purchase HERE.
Vix Mask 232 which you can get from her site HERE.
OK lets get started:
Open all supplies your gonna use in PSP.
Open up a new image 550x550 (you can resize later if wanted).
If not already done, flood fill your background white.
Copy and paste paper of choice, I used DBA PAPER 1.
Go to layers, new mask layer, from image, from your drop down menu choose Vix Mask 232, click OK. On your layers pallet on the right click on your original mask and merge group. you can lower the opacity of this mask layer if you would like, I did mine at 75 opacity.
Copy and paste frame of choice on top of your mask, I used DBA FRAME 2. Using your magic wand click inside the circle part of your frame. Then go to selections, modify, expand, by 5. With mine I added a new layer and flood filled white so that I could lower the opacity of my paper once added and it wouldnt show through. Selections, select none and then bring your white circle under your frame. Once again using your magic wand click in the circle part of your frame. Selections, modify, expand by 5. Copy and paste paper of choice, I used DBA PAPER 20. Selections, invert and delete on your keyboard to get rid of the excess. Selections, select none. Drop this layer below your frame layer but above the white circle layer. I dropped the opactiy of this layer to 70.
Add your tube!
Add any elements of choice, I used DBA BASS GUITAR 1, DBA MICROPHONE 1, and DBA WORD ART 2.
Drop shadow tube and all elements including frame with a drop shadow of choice.
Resize your tag to your liking.Add copy right info.Add your name.
All done!!
Hope you've enjoyed this tut.
Hugs, Dawn
littlefieldswife@yahoo.com

Friday, April 24, 2009

NEW TUTORIAL ~ ETERNAL ROUTE 66

ETERNAL ROUTE 66
AWESOME PTU KIT BY MAR CALLED ROUTE 66
CLICK ON TAG TO VIEW FULL SIZE

For this tutorial I am using the amazing works of Dave Nestler and you can purchase his work at CILM HERE.
I am using an awesome scrap kit by Mar from Scrapping Mar which is a PTU kit called Route 66 and you can find that on her blog HERE.
Template #33 by Pooker from Pookers Creations and you can find her templates on here blog HERE.
Vix Mask 147 which you can get from her site HERE.
OK lets get started. Open up Pookers template #33 and delete the copy right layer. Go to image, canvas size, 600x600. (You can resize later if you want). Flood fill the bottom layer with white to fill in the gaps after making the canvas bigger.
On top of your bottom white layer, add a new raster layer. Copy and paste paper of choice, I used Paper 7. Go to layers, new mask layer, from image, from your drop down menu choose Vix Mask 147, click OK. On your layers pallet on the right click on your original mask and merge group. you can lower the opacity of this mask layer if you would like, I did mine at 75 opacity. Add a new raster layer on top of the mask layer you just did. Make your foreground color #96413c and your background color #4e5275. Click on your foreground color and make it a gradient Angle:45, Repeats:3. OK. Flood fill your new raster layer with this gradient. Go to layers, new mask layer, from image, from your drop down menu choose Vix Mask 147, click OK. On your layers pallet on the right click on your original mask and merge group. You can also lower the opacity of this layer as well if you would like, I also did 75 on this one as well. With this mask layer you will go to image, flip, image, mirror.
On your rectangle 1 go to selections, select all, float, defloat and copy and paste paper of choice, I used Paper 14. Selections, invert, delete on your keyboard, selections, select none. Delete the original rectangle 1 layer. On your new rectangle 1 layer go to Adjust, Add/Remove noise...Add noise with settings: Uniform, Noise 30%, Monochrome checked and then add drop shadow of choice.
On the white ring layer just add a drop shadow of choice.
On rectangle 2 layer go to selections, select all, float, defloat and copy and paste paper of choice, I used Paper 3. Position in your selection where you want your paper to be and the parts you want showing. Selections, invert, delete on your keyboard, selections, select none. Delete the original rectangle 2 layer and add a drop shadow of choice to your new rectangle 2 layer.
Click on strip 1, selections, select all, float, defloat. Add a new raster layer and flood fill with black. Selections, select none. Delete original strip 1 layer and add a drop shadow of choice to your new strip 1 layer. Do the same exact thing for strip 2.
On the circle layer, selections, select all, float, defloat and copy and paste paper of choice, I used Paper 13. Selections invert and delete on your keyboard. While my circle layer was still selected I copied and pasted a part of a tube into the circle as well and hit delete on my keyboard to get rid of the excess. Selections, select none. I then changed the blend mode on that tube layer to luminance legacy. Delete the original circle layer and drop shadow your new circle layer.
I then closed off my white background layer and both mask layers and merged visible. Open back up the layers you just closed off. On your merged layer, image, resize, width and height 115. Make sure you dont have all layers checked.
Copy and paste your tube and add drop shadow of choice.
Resize your tag to your liking.
Add copy right info.
Add your name.
All done!!
Hope you've enjoyed this tut.
Hugs, Dawn

Thursday, April 23, 2009

NEW TUTORIAL ~ PRETTY MISS SPRING THING

PRETTY MISS SPRING THING ~ USING SPRING INTO HAPPINESS KIT BY JESSICA
CLICK ON TAG TO VIEW FULL SIZE

For this tutorial I am using the amazing works of Pinup Toons which you can purchase from CILM HERE.
I am using an awesome scrap kit called Spring Into Happiness from Jessica and you can visit her blog HERE. It is a PTU kit so I can not supply it. But please go to her site and check out this kit along with the many other beautiful kits she has. There is so much more to this spring kit than you see in my tag.
Template #43 from Beth at Blissfully Beth and you can download the template from her blog HERE.
Mask 09 by Yarrow that you can get from her site HERE.
Lets get started.
On your template #43 delete copy right layer.
Drop shadow your O frame and your black stripes with a drop shadow of choice.
On your bottom white layer copy and paste a paer of choice above this layer. I used SIH_paper15_JD. Then go to layers, new mask layer, from image, from your drop down menu choose Mask 09 by Yarrow, click OK. On your layers pallet on the right click on your original mask and merge group. I lowered the opacity and resized mine a bit but thats totally up to you.
On your O frame background, selections, select all, float, defloat and copy and paste paper of choice, I used SIH_paper11_JD. Go to selection, invert and hit delete on your keyboard. Selections, select none and delete frame background layer.
Using your magic wand click inside the lighter gray area of your stripe1 layer. Copy and paste paper of choice. Selections, invert, delete. Selections, select none. Using your magic wand again, click inside the darker gray area of your stripe1 layer. Add new raster layer and flood fill with black. Selections, select none. Delete your original stripe1 layer and bring your color paper below the black frame layer and add drop shadow of choice to the black frame layer. Do this same process for stripe layer2 and 3, using different colors and not forgetting to add the back frame layer along with bringing the color layer under the frame layer and adding the drop shadow.
On the top layer add your tube as a new layer, resize to your liking and add drop shadow of choice. i chose to duplicate mine and bring one below the frame O layer and erased parts of it so it looked like she was weaving in and out of the O. This part is totally up to you and takes a little play to get right.
You can then add and if need be resize any elements of choice. I used SIH_ribbonwithflowers1_JD and SIH_wordartsticker1_JD. But there are so may more elements that you can add to yours. Add drop shadows of choice to your elements.
Add your copy right info. Add your name. All done!!!
Hope you've enjoyed this tut.
Hugs, Dawn
littlefieldswife@yahoo.com